Admin Guides / Collections and entitlements
Onboard a collection
Take an imported collection through the eight steps of Collection Onboarding and make it requestable.
Collection Onboarding prepares one collection for requests: who owns it, who does its manual work, how its requests are approved, how long access lasts, who can ask for it, and what each entitlement is called and allowed to do. The last step makes it live.
Open the wizard
Open Warde > Collection Onboarding, or the Setup item on the Admin Workspace rail. Without a collection named, the wizard opens on Choose a collection, a table of every collection with its status, entitlement count and engines. Select Set it up on one.
From a collection record in the Admin Workspace, the Guided onboarding button opens the wizard on that collection. The workspace list Catalog > Collections: onboarding shows everything still waiting.
Collection Onboarding needs the Warde administrator role.
The eight steps
Each step checks the collection when you open it and shows a summary in the left rail, so you can stop and come back later. A step with a warning does not stop you going live.
1. Describe the application
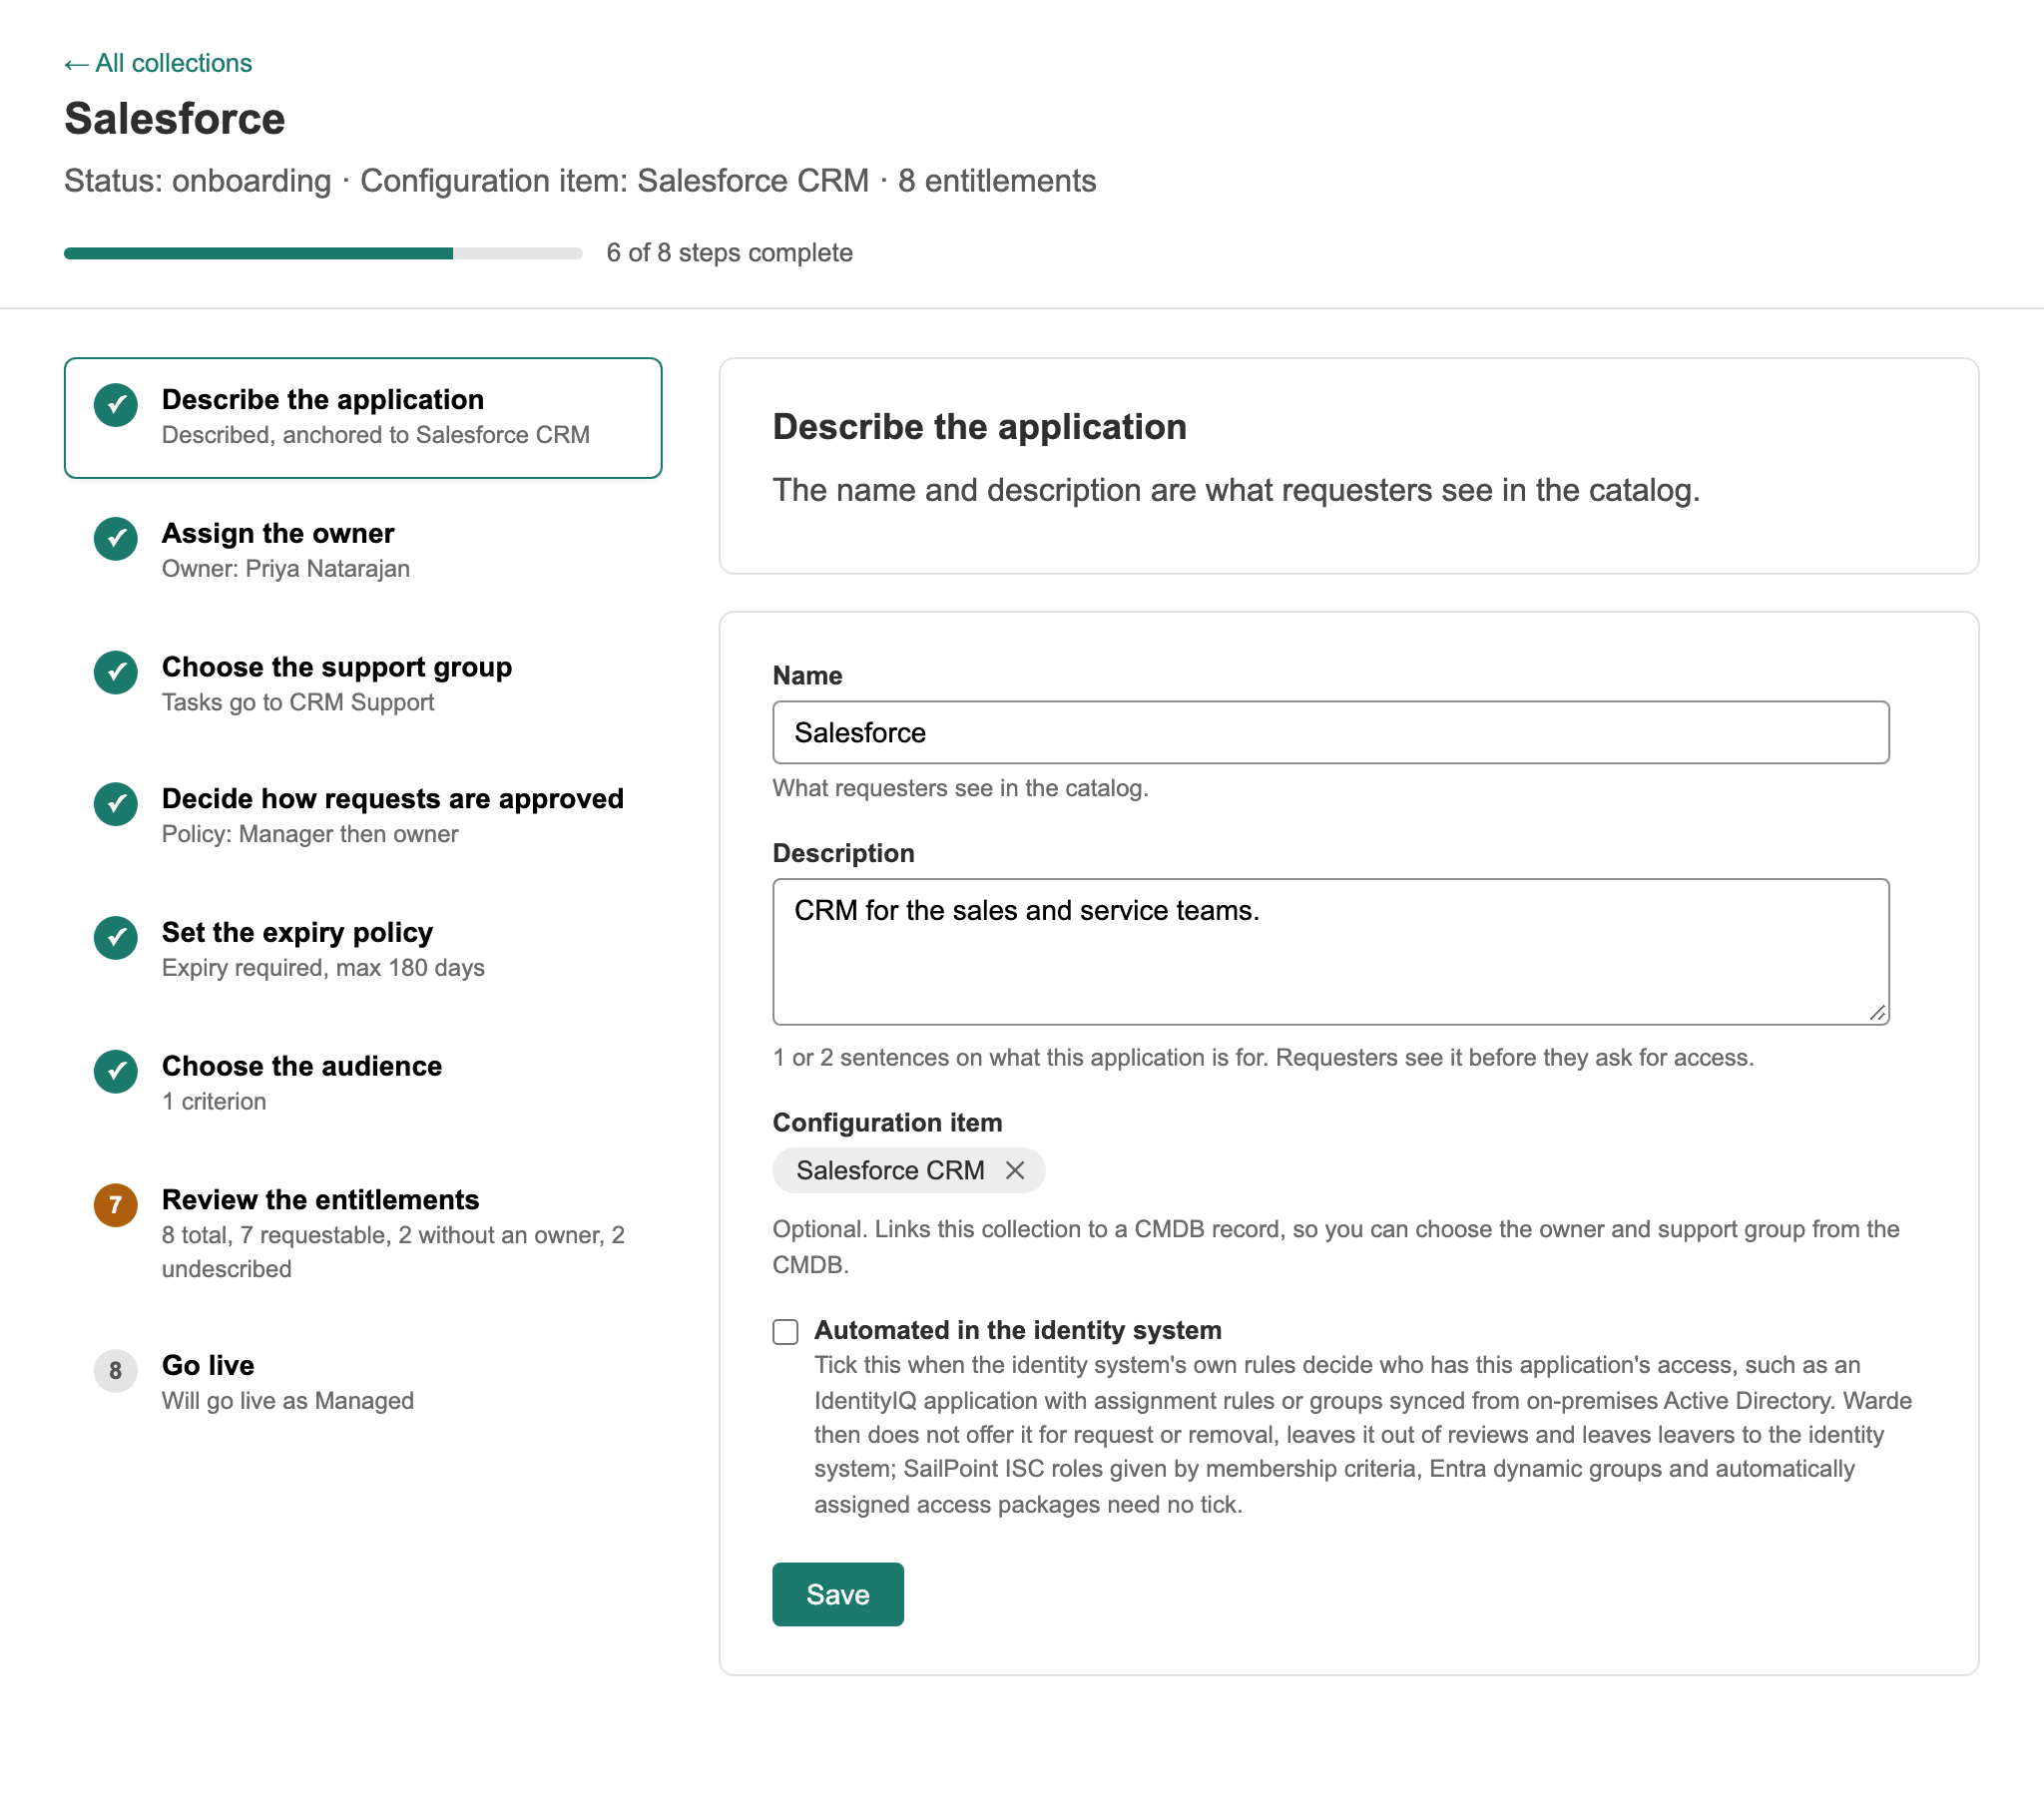
Requesters see the name and description in the catalog, so write the description in their words. A configuration item is optional; with one, the next two steps can read the owner and support group from the CMDB.
If the engine names the collection (ISC sources and Entra applications and catalogs do), the name follows the engine and you rename it there. Warde renames the collection, its entitlements' labels and everything that shows them on the next sync.
2. Assign the owner
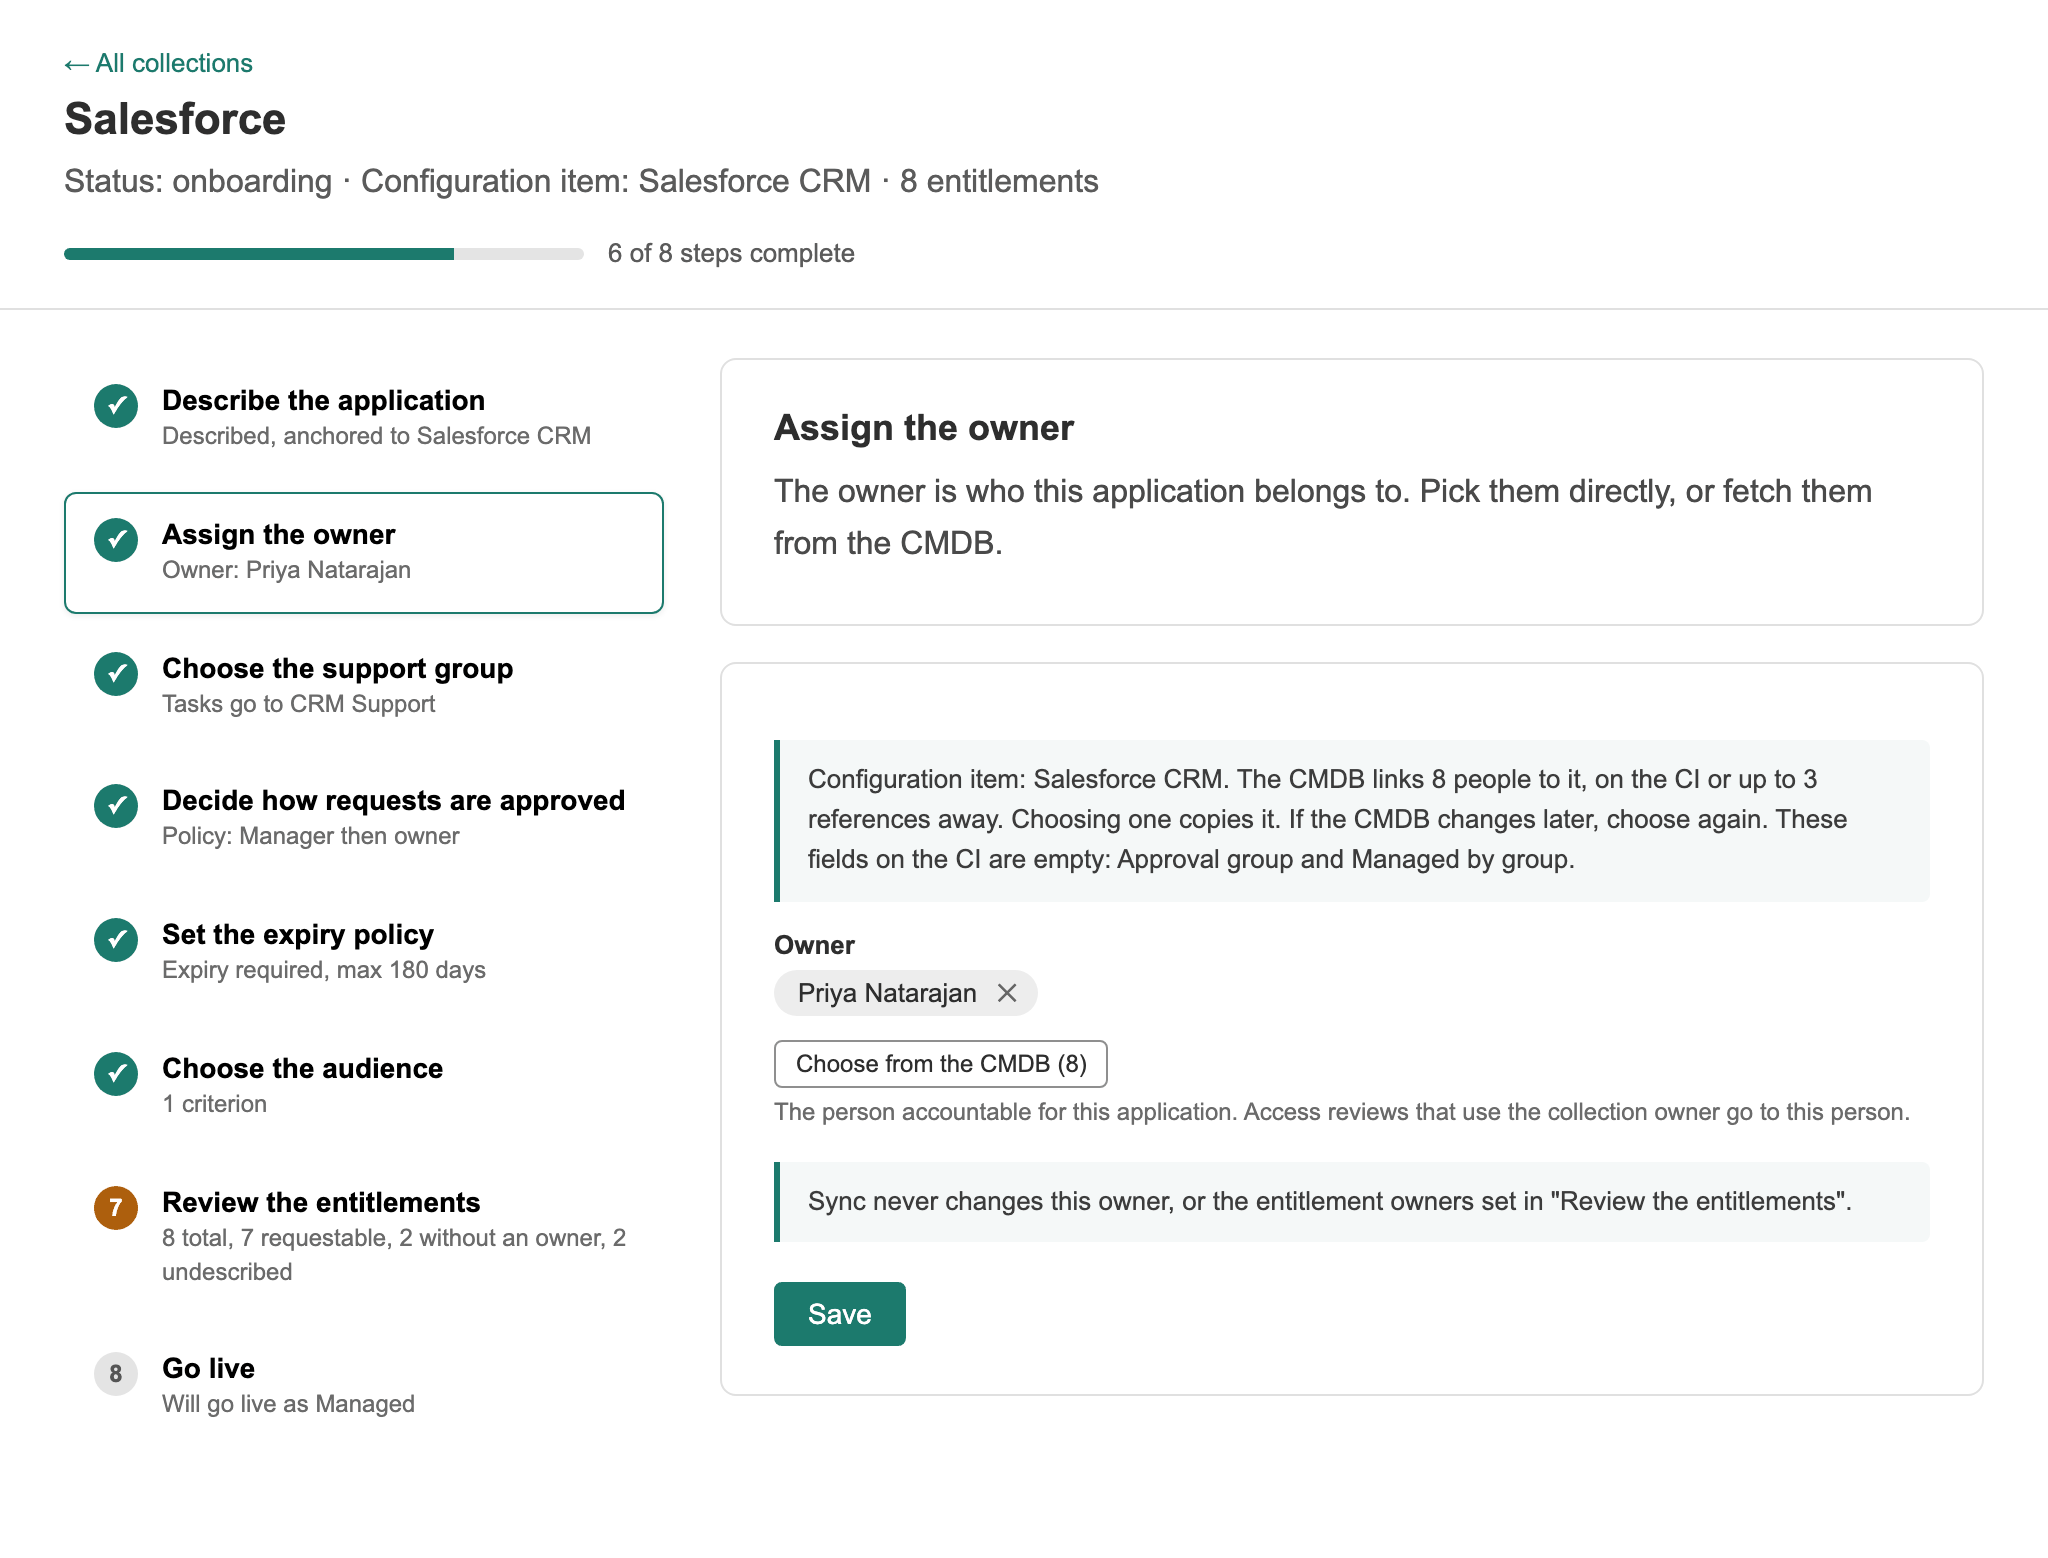
The person accountable for this application. Search for them, or choose from the people the CMDB links to the configuration item. The owner can be a reviewer for access reviews and appears on the collection's records. Approvers are set in the approval policy, not here.
3. Choose the support group
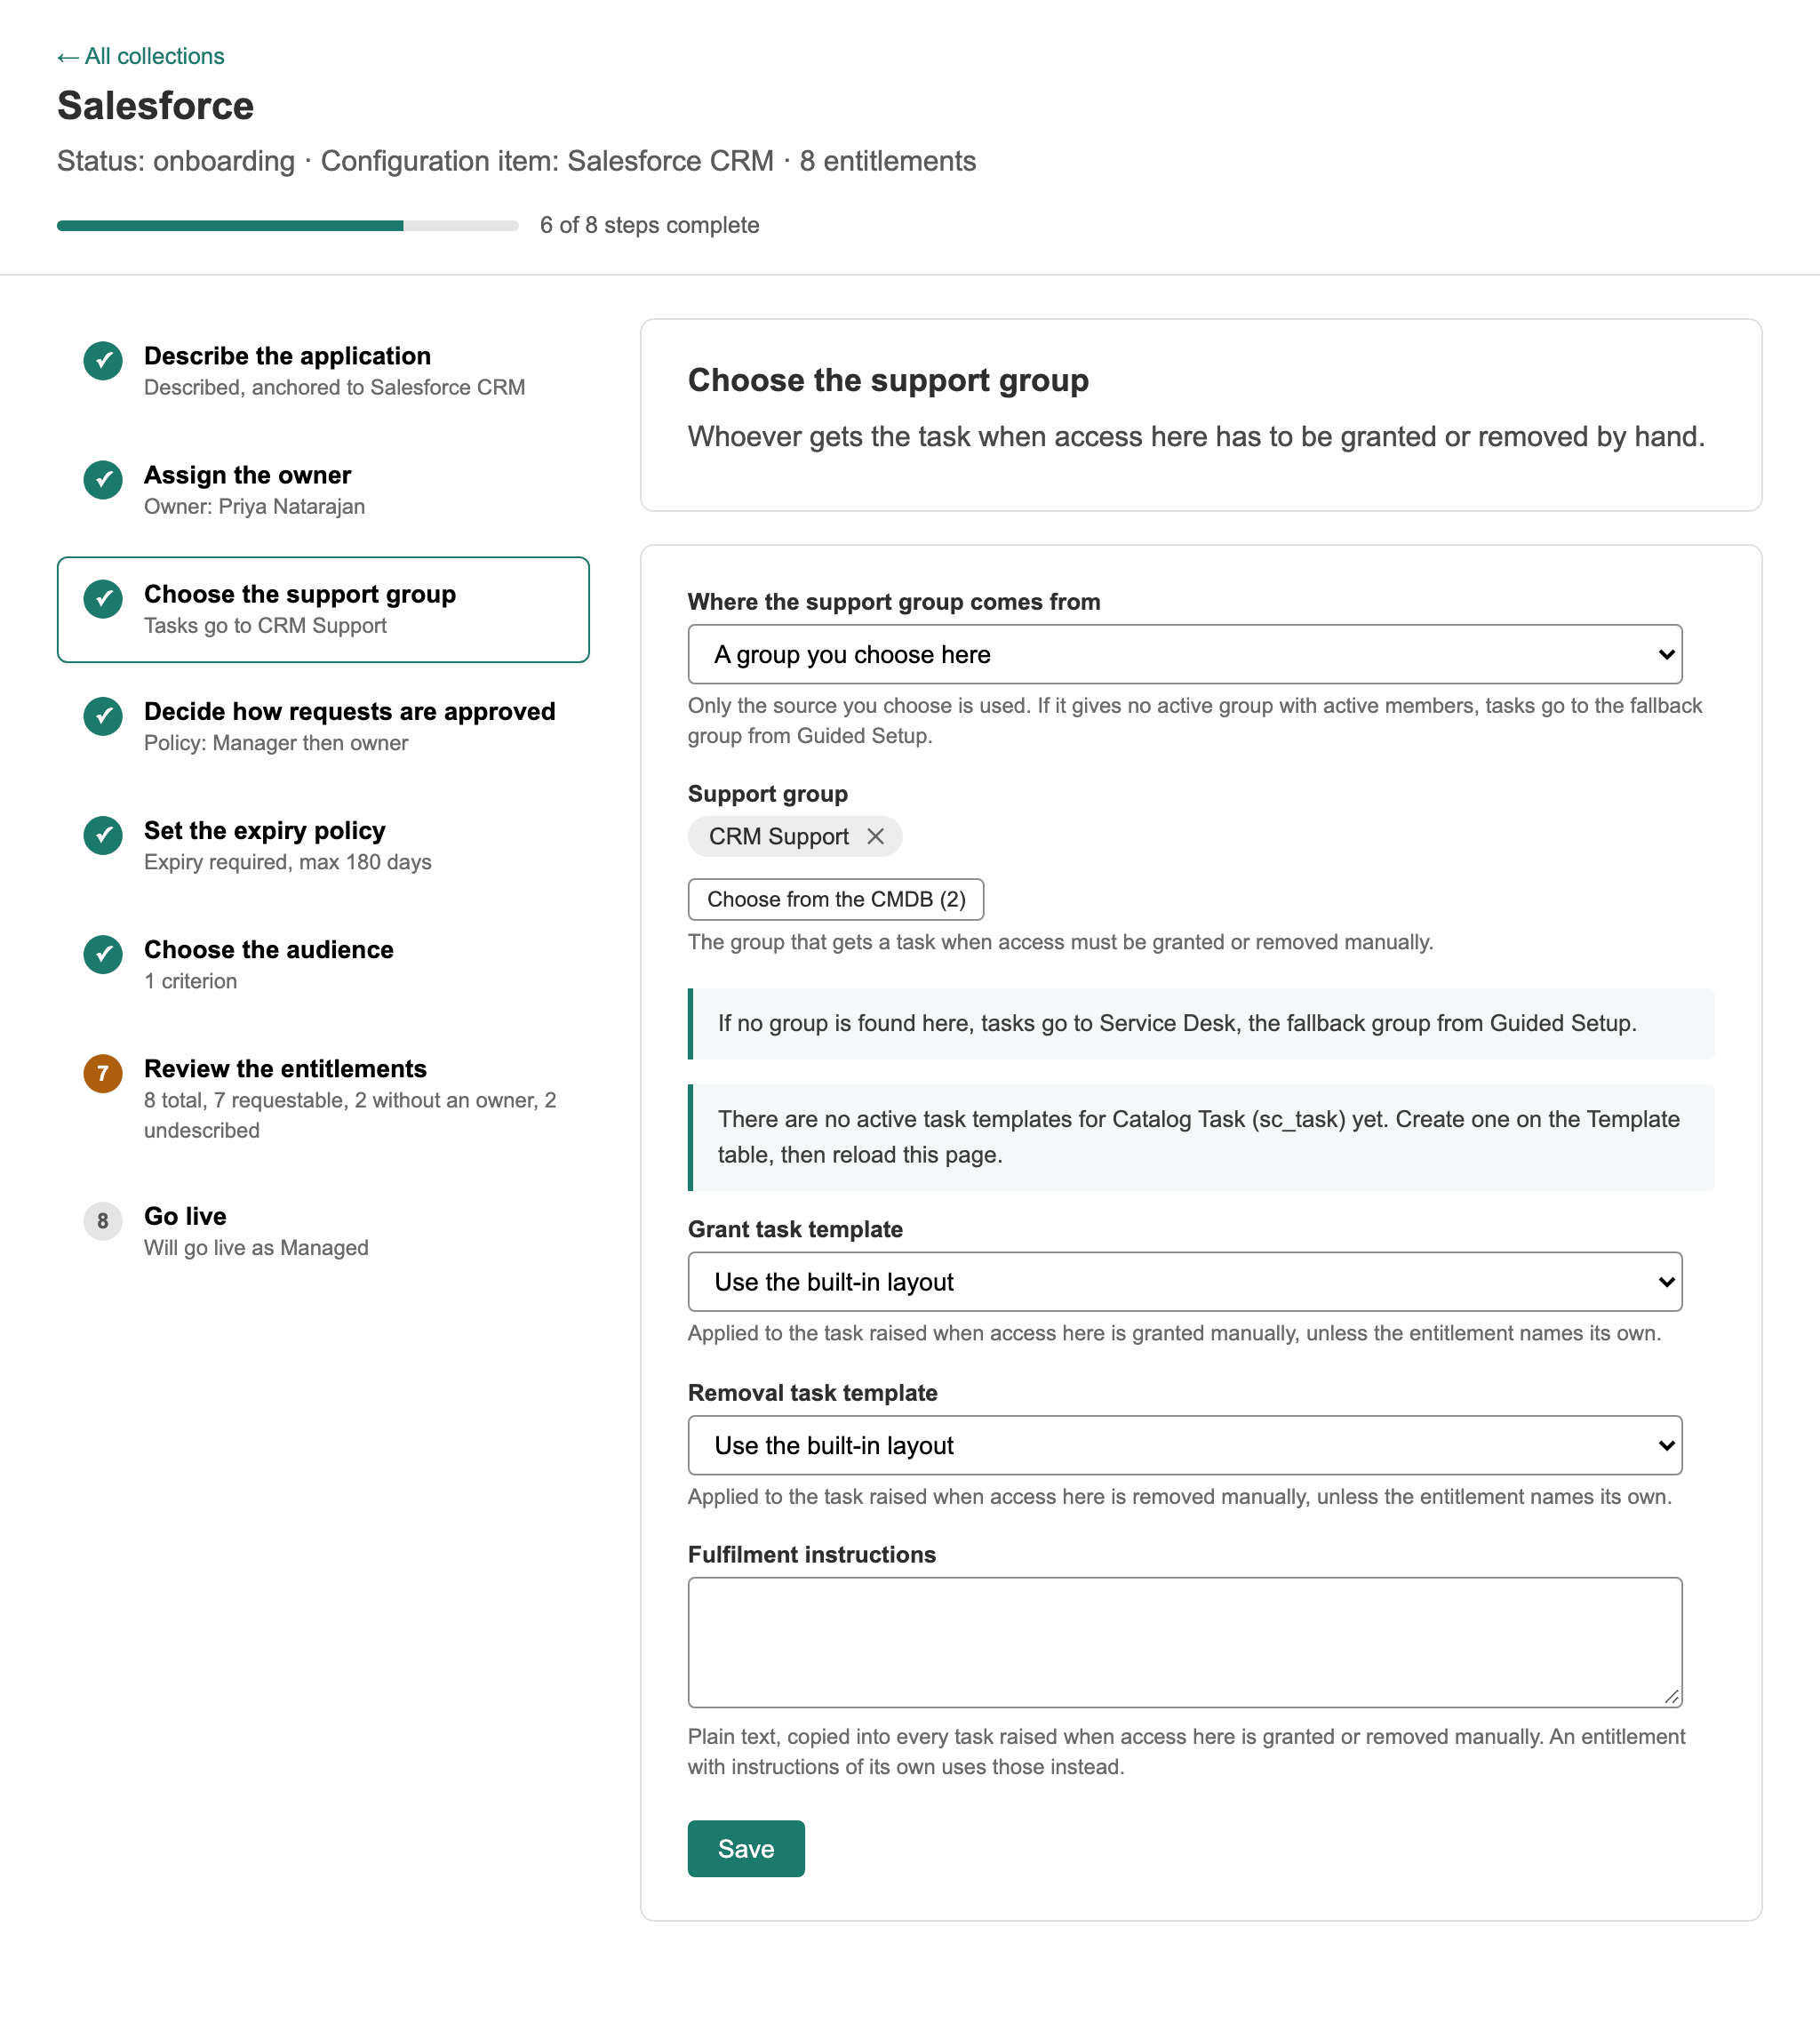
The group that gets a task when access has to be granted or removed by hand, and what that task tells them to do:
| Setting | What it does |
|---|---|
| Support group source | A fixed group, or a field on the configuration item that holds one (up to three fields, such as support_group) |
| Fulfilment group | The group, when the source is a fixed group. It does not approve anything. |
| Fulfilment instructions | How to carry out a manual grant or removal, copied into every task. An entitlement's own instructions replace these. |
| Grant and removal task templates | Catalog task templates applied to this collection's tasks |
If the group is inactive or has no active members, the task goes to the fallback group from Guided Setup step 8. The step summary says where tasks will go.
4. Decide how requests are approved
| Setting | What it does |
|---|---|
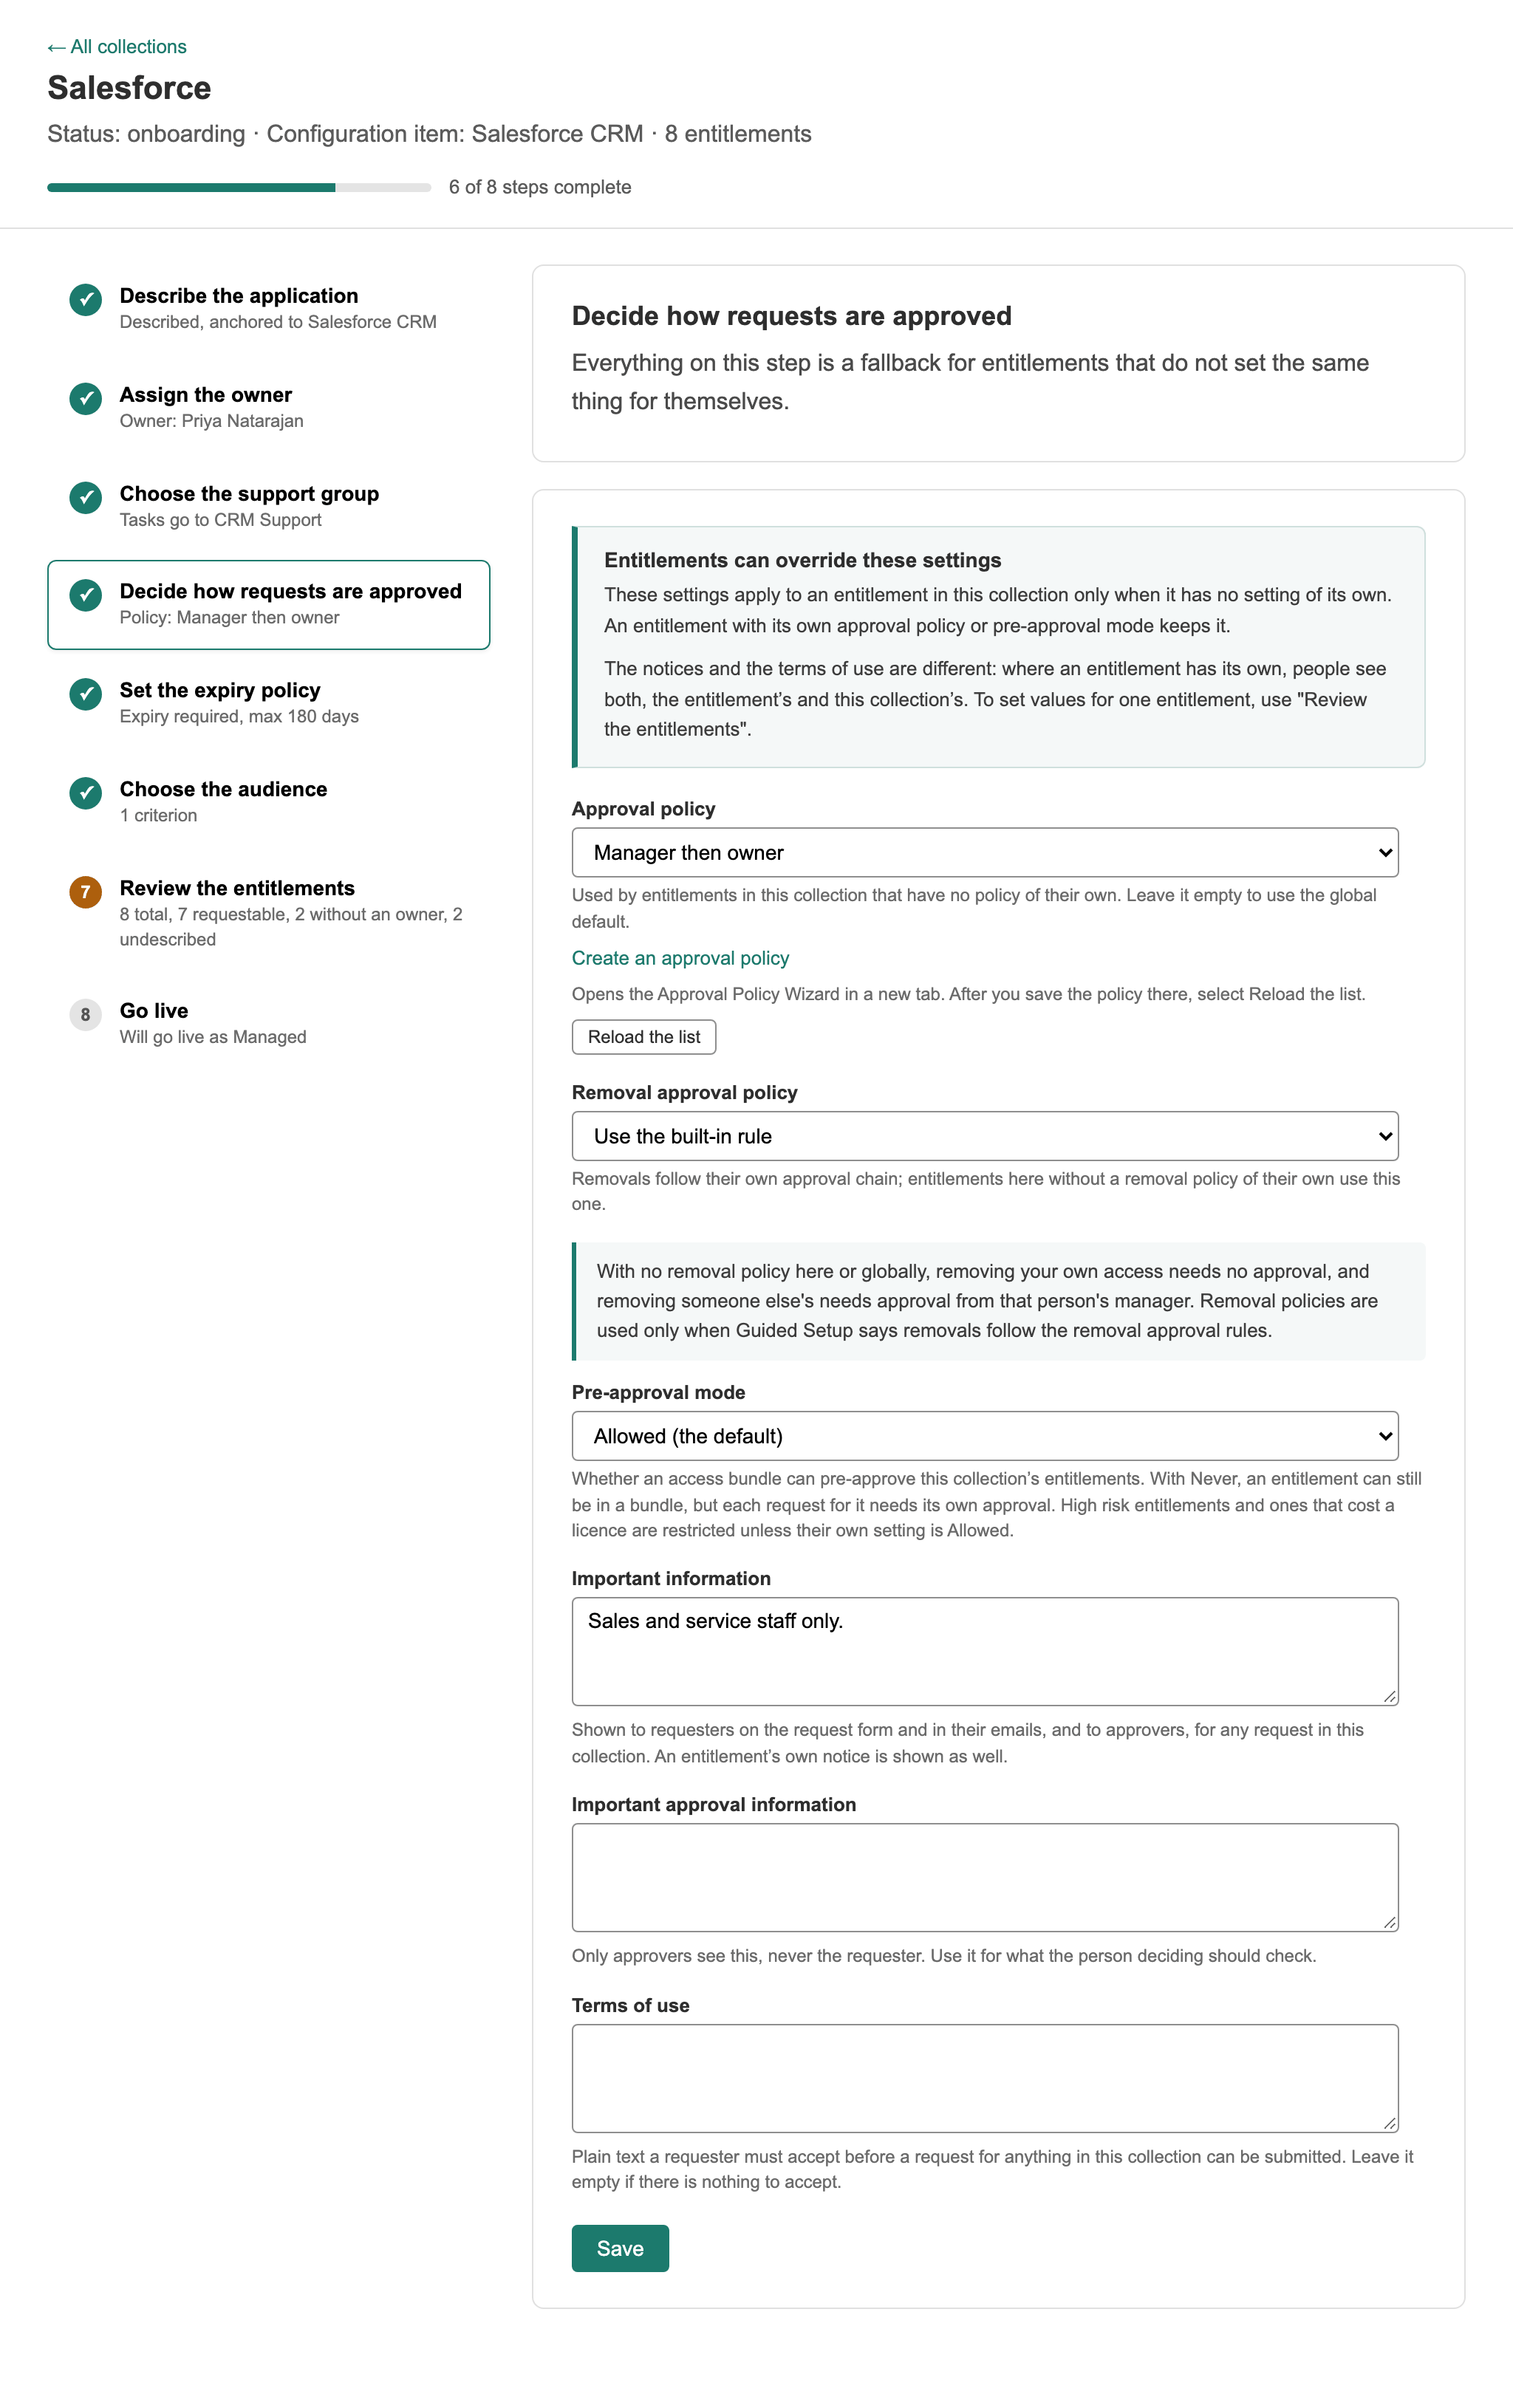
| Approval policy | How requests for this collection's access are approved, when the entitlement or bundle has no policy of its own. Empty uses the instance default. |
| Removal approval policy | How removals are approved, when the entitlement has no policy of its own |
| Pre-approval mode | Whether entitlements here can be pre-approved into access bundles. Empty means allowed. |
| Important information | A notice shown to requesters on the form and to approvers |
| Important approval information | A notice for approvers only. Requesters never see it. |
| Terms | Terms the requester must accept before submitting. Leave empty for none. |
The summary warns if the chosen policy has no rules, or if there is no policy here and no instance default: requests for the collection would stop.
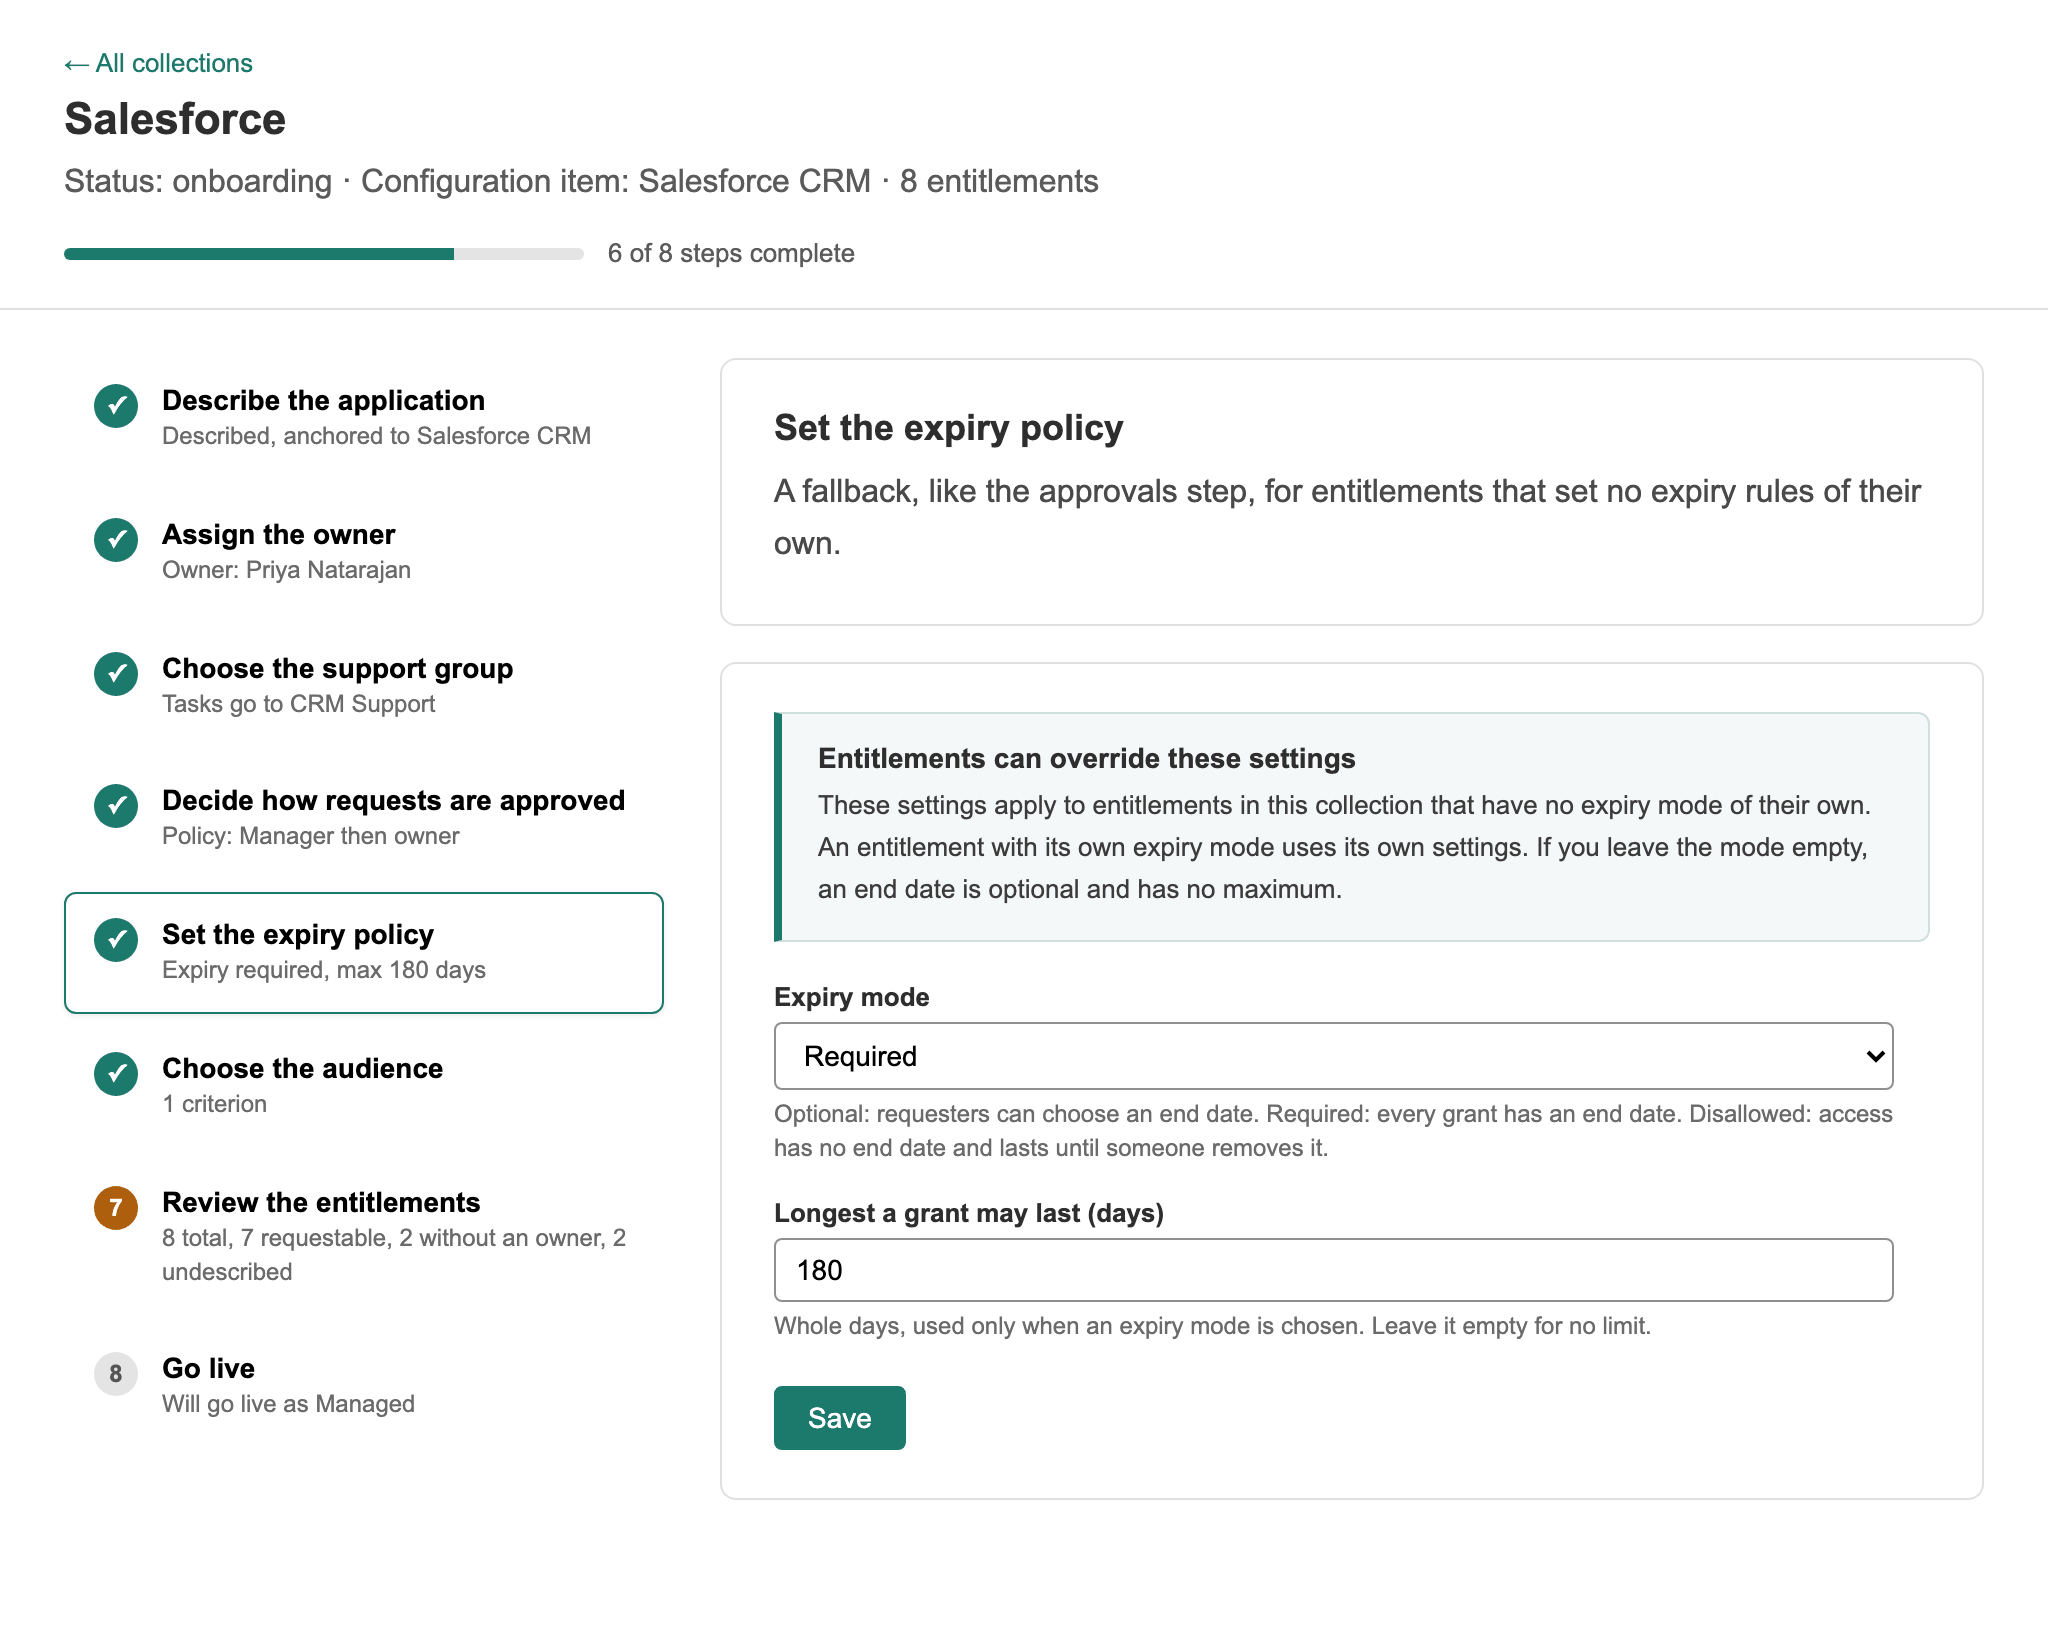
5. Set the expiry policy
| Expiry mode | Meaning |
|---|---|
| Optional (the default) | The requester may set an end date |
| Required | Every request must set an end date |
| Disallowed | Access in this collection never has an end date |
Expiry max days sets the longest a grant may last. Empty means no limit. When access expires, Warde removes it the way Guided Setup step 8 says, after emailing the person 14 days before and the person and their manager 3 days before.
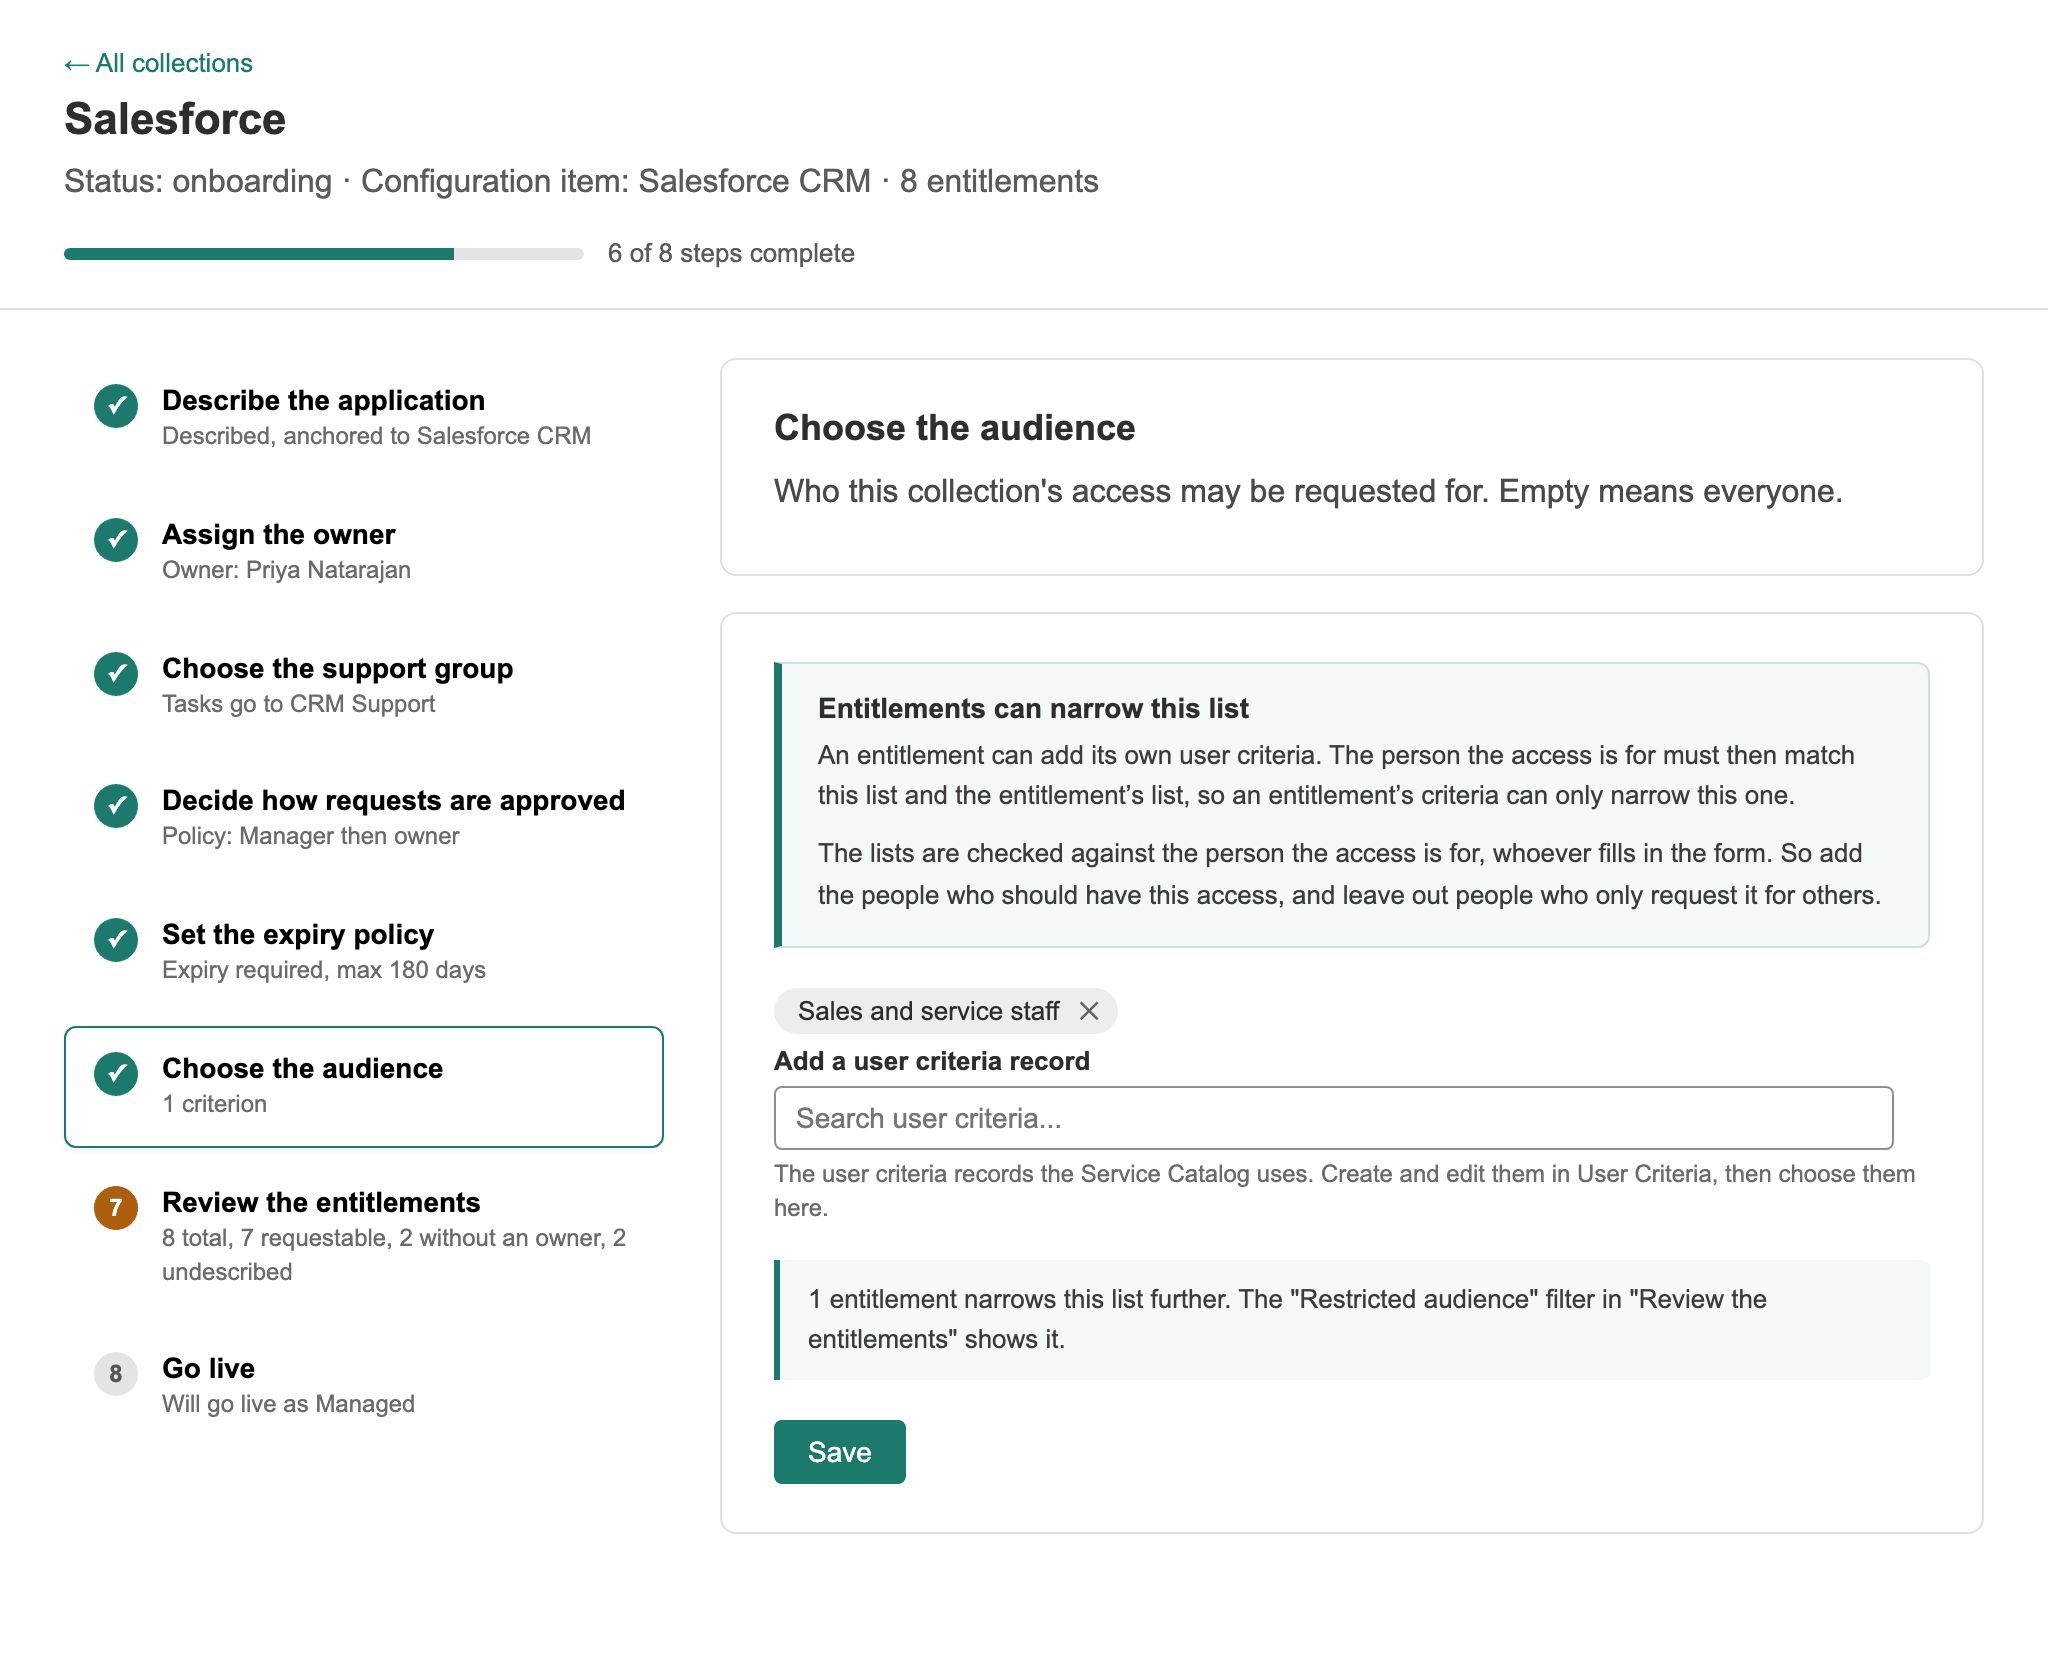
6. Choose the audience
User criteria for who this collection's access can be requested for. Empty means everyone. The person the access is for must match, whoever fills in the form.
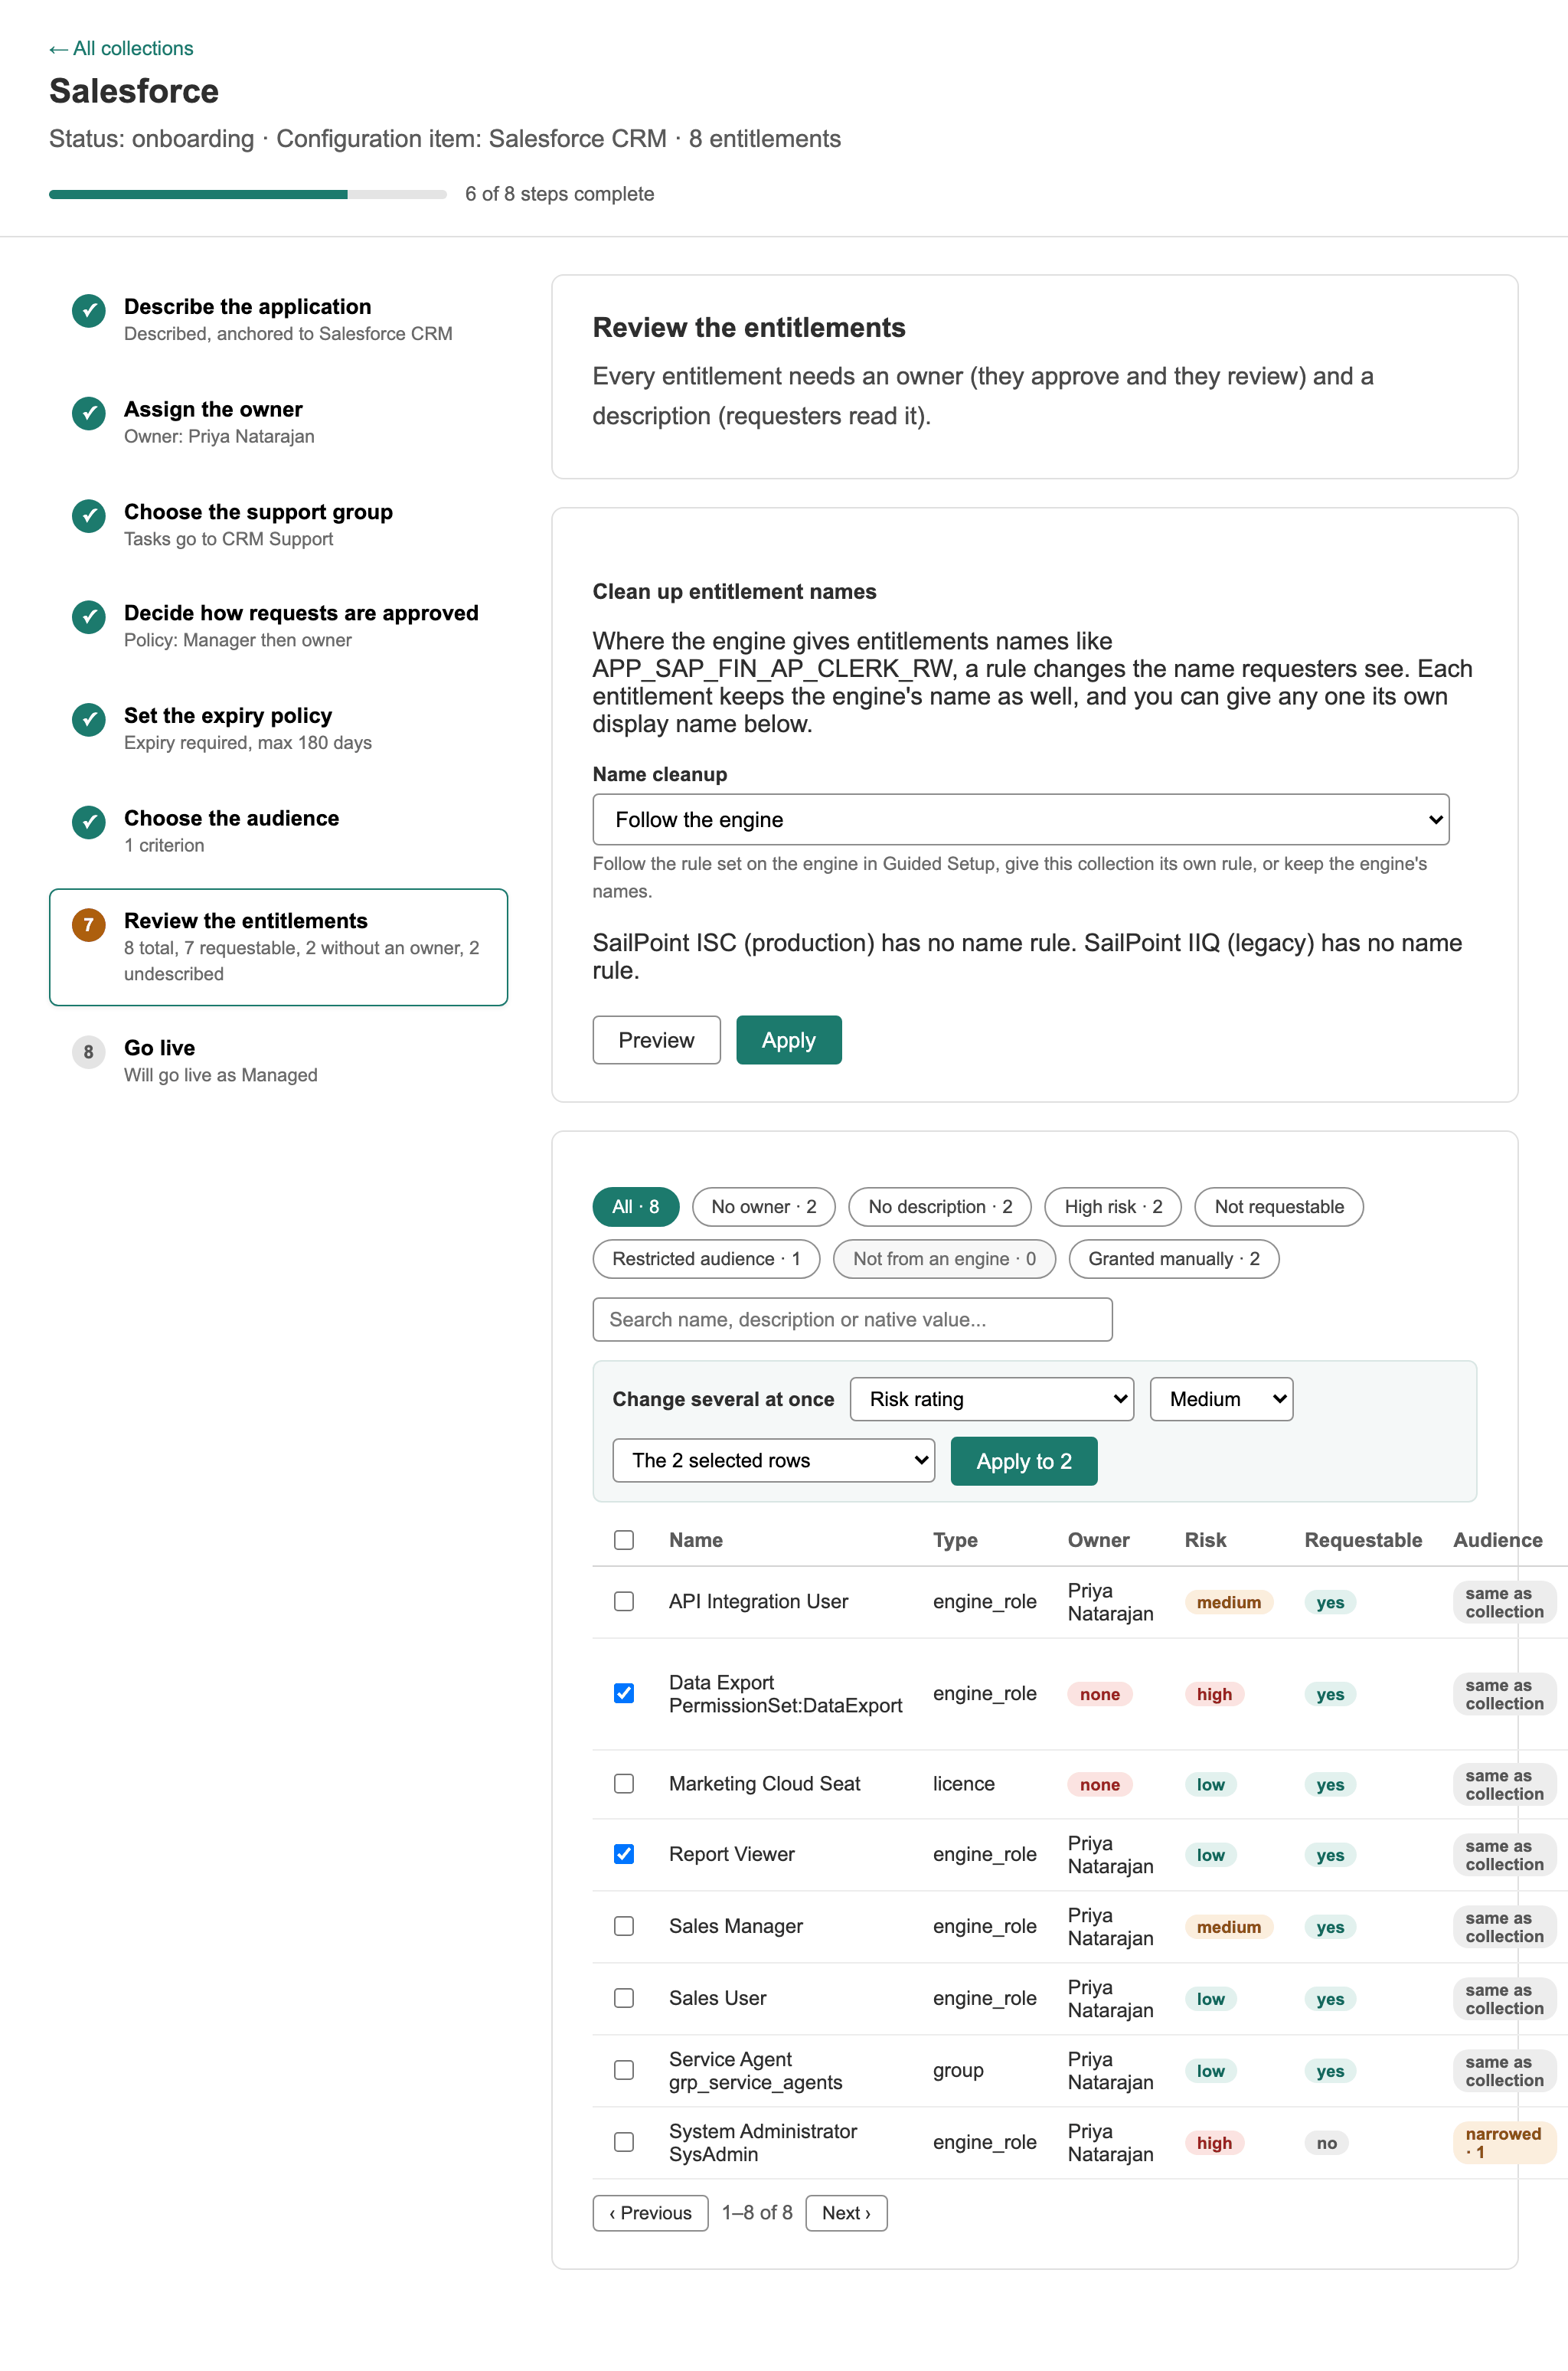
7. Review the entitlements
Each entitlement needs an owner and a description, and anything people should not ask for needs Requestable turned off. The grid edits several entitlements at once with the bulk bar, and the drawer on each row edits one in full, including what it requires and what it replaces. Clean up entitlement names at the top of the step applies a name rule to every entitlement in the collection.
A setting on an entitlement replaces the collection's, except the audience, important information and terms of use, which combine with the collection's. Every field is described in Entitlements.
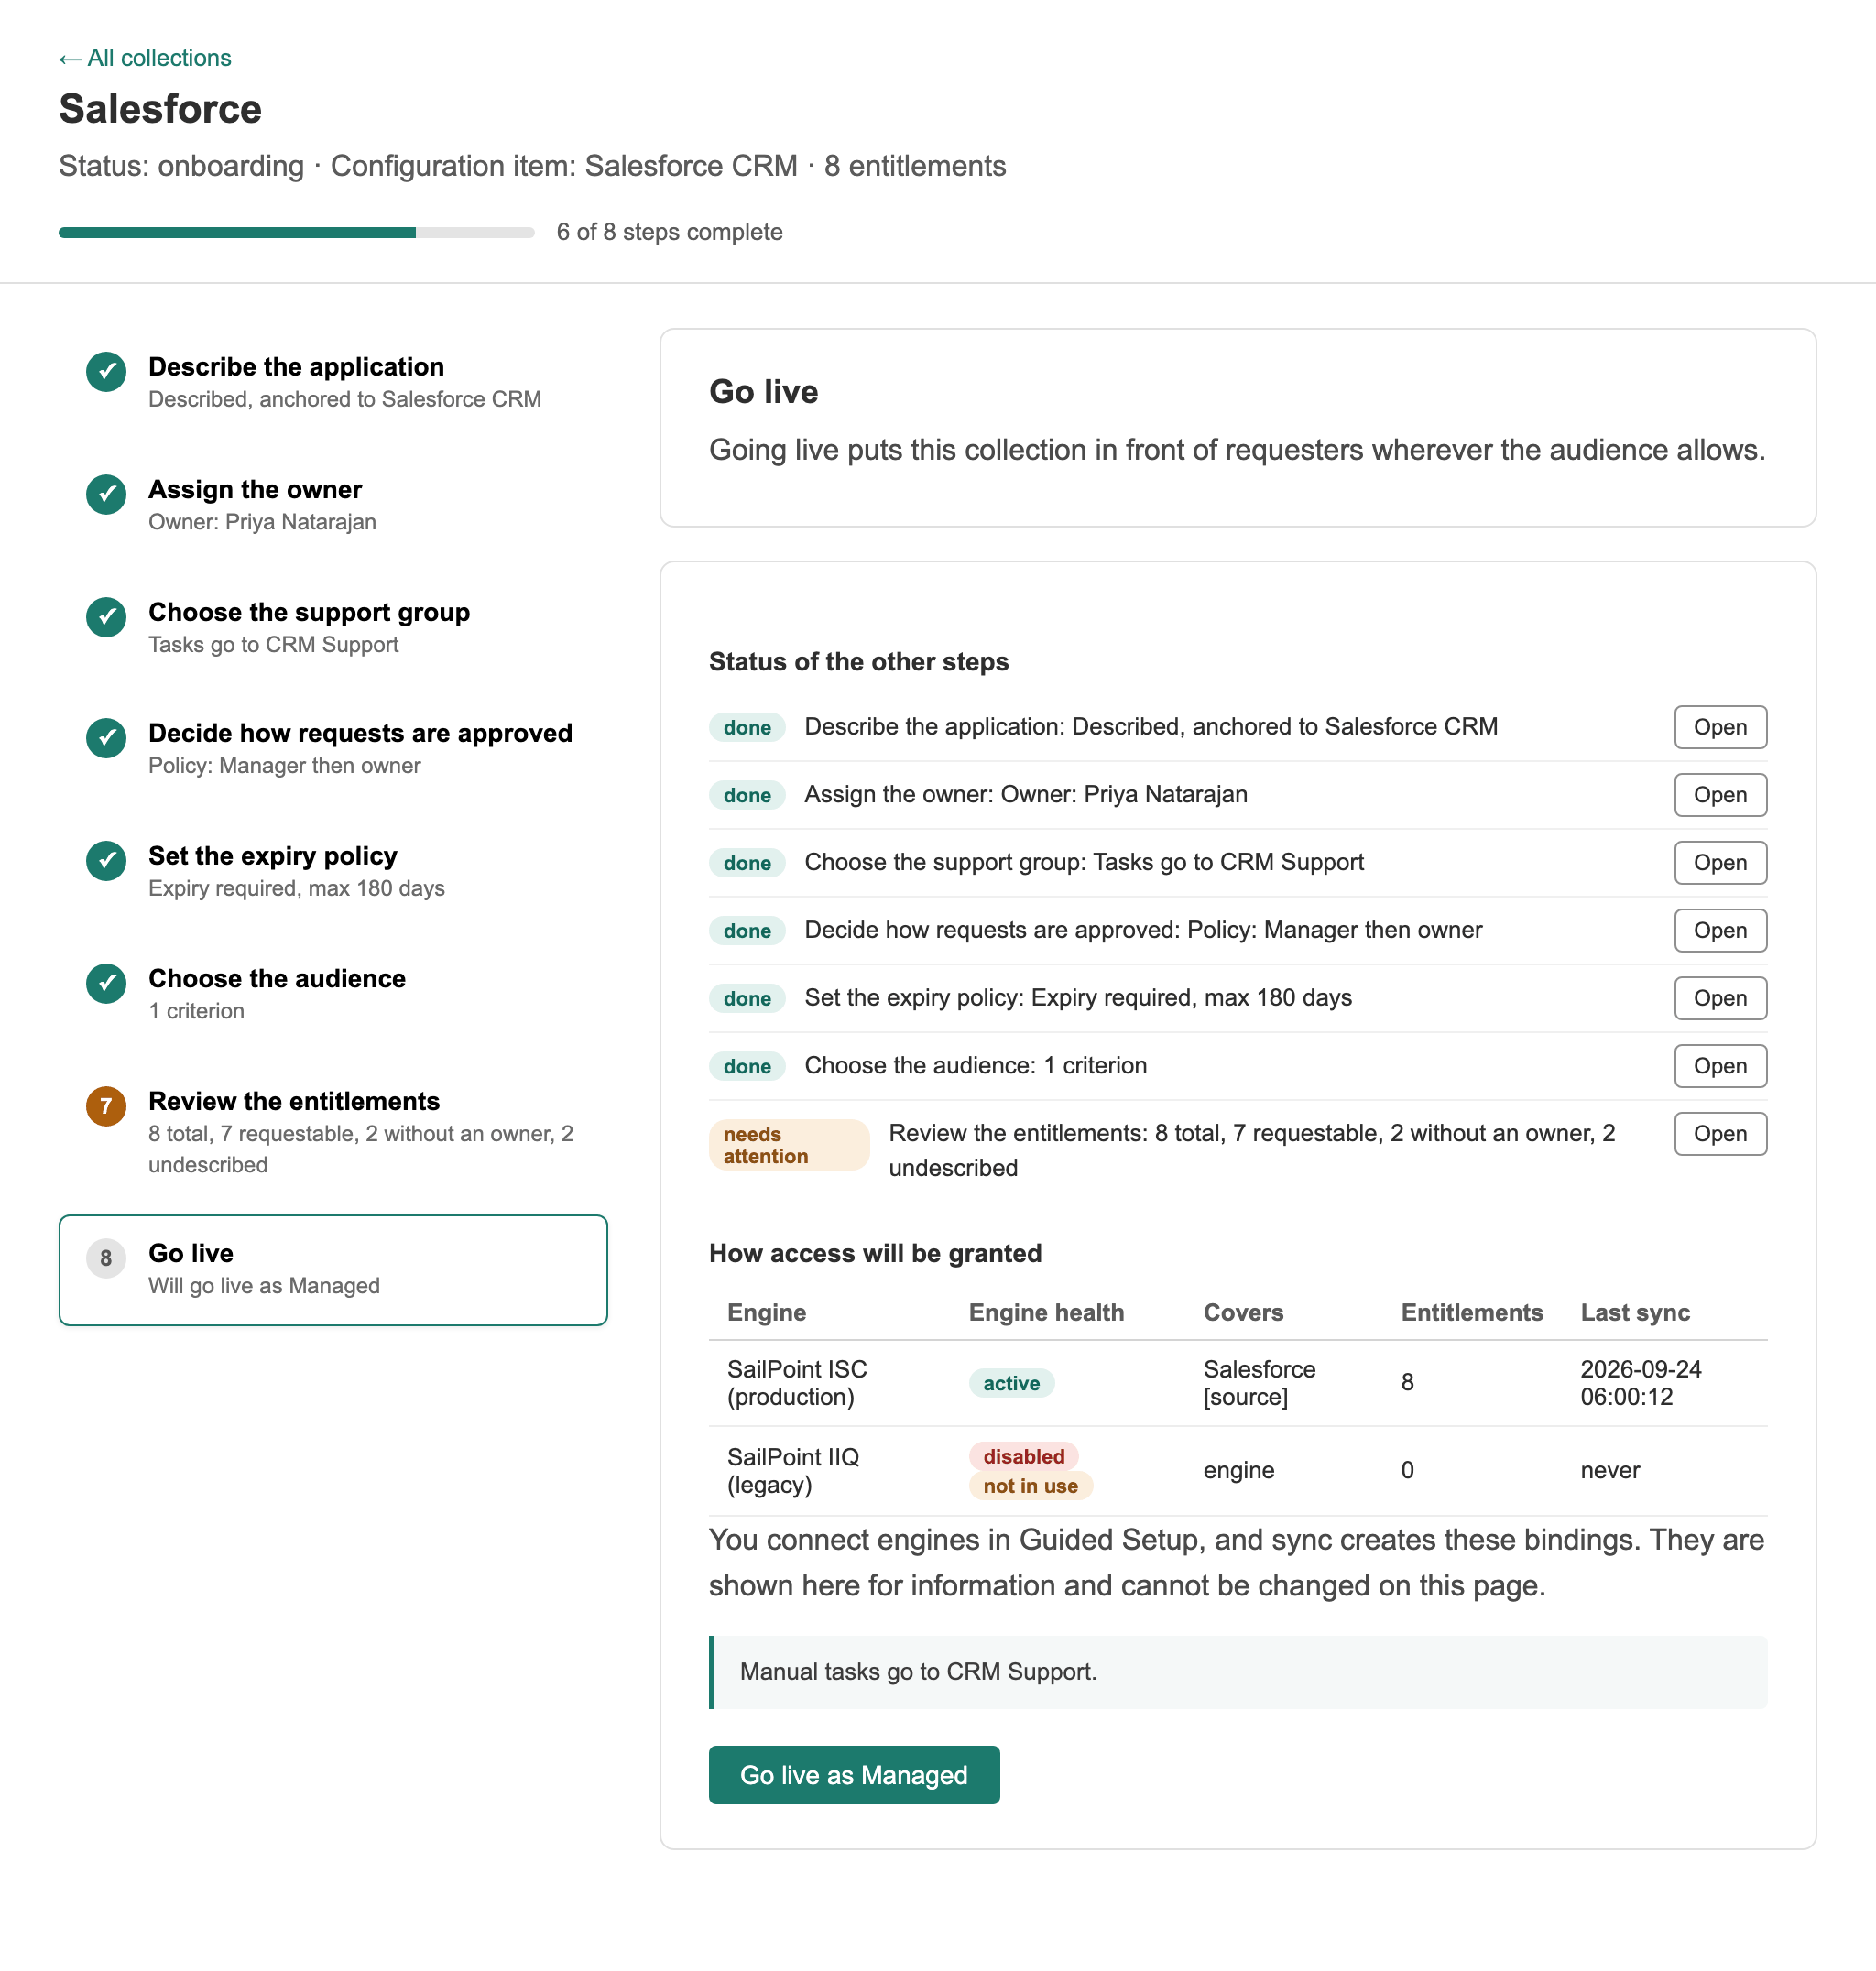
8. Go live
Going live sets the status:
| Status | Meaning |
|---|---|
| Managed | An engine is bound. Warde grants and removes through it, and uses tasks only for what the engine cannot do. |
| Unmanaged | No engine is bound, so every change is a ServiceNow task for the support group |
| Onboarding | Being set up, hidden from requesters |
| Retired | No longer used |
If any step still has a warning, the button reads Go live anyway. You can move a collection back to Onboarding at any time with Move to Onboarding. Going live and moving back are both written to the audit history.
After go-live
A live collection keeps changing: the engine adds entitlements, renames things and removes them. A new entitlement in a live collection still needs its owner, description and risk from you, so check the Entitlements with no owner list after each catalog sync. See Catalog health.
To help requesters through a large collection, give it guided questions.